Rationale
Containers offer several benefits and an ideal environment for running GitLab CI jobs. They offer isolation to ensure the job's dependencies and configuration don't interfere with other jobs on the same machine. Containers also ensure that each GitLab CI job runs in the same environment, ensuring the reproducibility of the job's results. In addition, they offer portability and scalability, making it easy to run GitLab CI jobs on different infrastructures or cloud providers and to handle changing workloads. Finally, containers offer faster job start-up times, enabling quicker spin-up of GitLab CI job environments and faster execution of tests. Overall, containers provide a flexible, scalable, and efficient way to run CI/CD pipelines.So why not run your GitLab CI jobs on OpenShift cluster?
GitLab Runner Operator
Regardless of where your GitLab is running, you can run your Gitlab CI jobs on container by setting up GitLab runners (agents) in OpenShift. The fastest way to do this is to install the Gitlab Runner operator.
The following steps will guide you through the installation of GitLab runner operator on OpenShift.
1. There are prerequisites for installing GitLab Runner Operator. One of them is that the OpenShift Cluster must have "cert-manager" installed. This is used by the GitLab runner operator for requesting TLS certificates. The fastest way to install cert-manger is through Operators. Note that you must be a Cluster Administrator in order to install operators from Operator Hub. Navigate to Operator Hub and search for cert-manager. You may find two entries and you can install any of the two but for this example, we will use the Red Hat version of cert-manager.

2. Install the Operator from the UI using all default configurations.
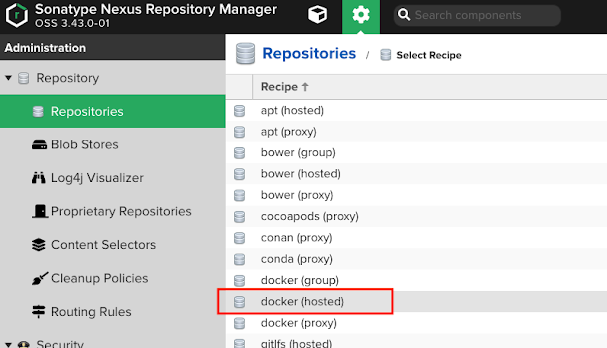
3. Once cert-manager operator is installed, navigate back to the OperatorHub, look for GitLab runner. Select the Certified version of GitLab Runner Operator. Certified means it has been tested to work on OpenShift.

4. Install the operator using the default configurations as shown below.

5. After the installation is complete, verify the installation by making sure that the gitlab-runner-controller-manager pod is running in the openshift-operators namespace.

6. Create a Project/namespace where you want to GitLab runners to run. Let's call it gitlab-runners.

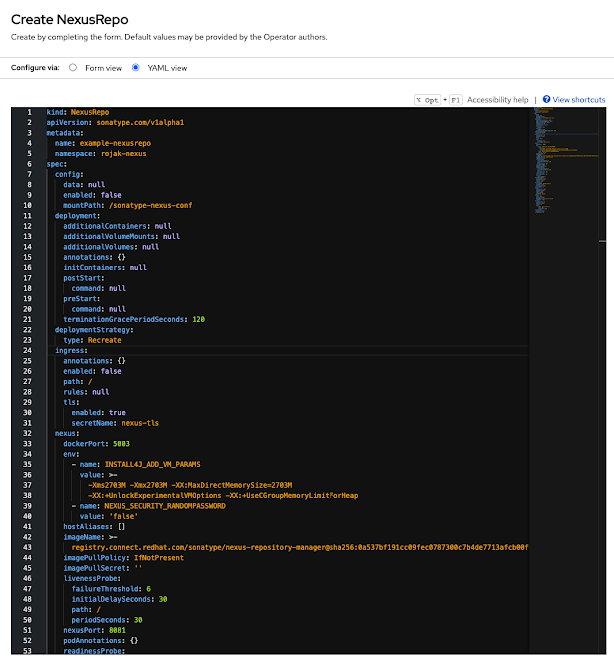
6. Now that you have the operator running and you have a namespace for gitlab runners, you can create instances of GitLab runner by creating the "Runner" CRD. But before we create our first GitLab runner, we need to first create a secret that will hold the runner registration token. This is the token from your GitLab instance used by runners to register themselves.
Get the runner token secret from your GitLab instance by going to the Admin Area > CI/CD > Runners page. Then click the "Register and instance runner" button. Copy tRegistration Token.

7. Navigate to the gitlab-runners project. Create a secret called gitlab-dev-runner-secret by navigating to Workloads > Secrets > Create > Key/Value Secret as shown below.

8. Once the secret is created, we can now create our first gitlab runner instance. Navigate to Installed Operators > GitLab Runner > GitLab Runner tab in the gitlab-runners project and click the Create Runner button.
Give it a name. The Gitlab URL field should be the base URL of your GitLab instance.
Leave the rest of the fields default. Click the Create button.

9. Once the GitLab runner pod is running, verify if the runner could register itself to GitLab by navigating to Gitlab and see if the new runner is listed, as shown below.

Conclusion
Et Voila! Now, all your GitLab CI jobs with the tag "openshift" will be executed by this new GitLab runner running on Openshift.
You can create as many runners as you want. You may want a dedicated runner for front-end builds and another runner for back-end CI builds.
You can play around with the runner YAML and experiment with configurations such as setting up a dedicated service account for the runner. If your CI build is accessing the K8s API of OpenShift, you may want to use a service account that has access to the Kube API.
Enjoy!