Thursday, October 15, 2020

Running Openshift at Home - Part 1/4 Homelab Hardware

Part 1/4 - Homelab Hardware

Part 2/4 - DIY Silent Server Cabinet
Part 3/4 - Installing a Two-Node Proxmox VE Cluster 

Part 4/4 - Deploying Openshift 4 on Proxmox VE

This is a series of post from building the hardware infrastructure that you can run from the comfort of your home to running you first application in Openshift 4.5/OKD4.5.

Objective

About a month ago I decided to build a homelab. All I wanted was to run my own Openshift cluster at home so that I can build and deploy applications to rapidly test ideas but also to develop my expertise in Openshift. I was shaving yak and ended up building a homelab and a IKEA server cabinet from scratch. 

Previously, I have been running my experiments on the cloud and it has cost me quite some $$ with monthly bills ranging from $80 to $250. This is another motivation factor. So if I could run my experiments on a homelab that cost's less than the price of iPhone 11 pro, with only additional $20 a month on electricity bills, I would call it a success. 

Disclaimer: I am not a systems engineer. My day job is a Software Architect, I design and build software solutions.

Hardware


Some homelab setup of folks I know cost thousands of dollars using Intel NUC computer or some desktop grade computers using multi-core AMD Ryzen CPU. This is beyond the budget my wife has agreed for this project :). So I did some google search and learned about this Reddit forum where people are mostly using old servers discontinued and no longer supported (EOL) by manufacturers and have been disposed off data centers. There is quite a lot of these listed on ebay. For less than $300, you'll get an enterprise grade server with 8 to 12 physical cores which is amazing!

There is just one caveat. These servers are not designed to be run at home. They are designed to sit in data centers away from people. Therefore, noise was not taken into consideration in their designs. These servers are very loud. But this did not stop me as I am already thinking of a solution to the noise problem. In the above photo, the entire homelab infrastructure is enclosed in an IKEA BESTA cabinet which I will talk about in more details in another post.

Being in Singapore, ebay or amazon is not really an option. These servers weigh up to 25kg. Shipping cost would have been more expensive than the item itself. Thankfully, we have Carousell in Singapore. When I searched for "used server" i got a few results and this is where I bought all my servers.

I used 3 servers for more compute power plus redundancy but it's not mandatory. It's totally fine to start with one server. The 3 servers and the network switch were sourced from Carousell. A quick search for "server" keyword in Carousell gives you this kind of result.


So here's what I got.

  • 1x HP Proliant DL360 G6

    • 12 Cores/24 threads

    • 128 GB RAM (originally 64GB)

    • 4x 300GB SAS HDD (RAID 5)

    • $300 from Carousel + $180 on upgrades, additional 3 SAS disks + Raid cache

  • 1x Dell PowerEdge R710

    • 12 Cores/24 threads

    • 128 GB RAM (originally 64GB)

    • 2x 2TB SATA HDD (RAID 1)

    • $350 from Carousell + FREE Memory sticks from a Friend

  • 1x Dell PowerEdge R520

    • 16 Cores/32 threads

    • 96 GB RAM (originall 48GB)

    • 4x 2TB SAS HDD (RAID5)

    • $450 from Carousell + FREE Memory sticks from a Friend

  •  1x Cisco SG95-24 Network Switch

    • 24-port un-managed gigabit switch

    • $40 from Carousell

  • 1x ASUS Gigabit Router

    • I used my old Wifi router, as a wired router to isolate the homelab from my home network

  • 4x Raspberry Pi 2B (Everything below is free, I already have them in my junk stash)

    • I used my 4 old Raspberry Pis (model 2B) lying around the stash of cables and electronics. I used these Pis before when I was experimenting on Hadoop clusters.

    • 13x Patch cables

      • Cat 6 UTP Path cables 1.5m

    • 2x 4-socket Powerstrips

    • USB Power supply for Raspberry Pis 


    HP Proliant DL360 G6
     

    Dell PowerEdge R710

    Some of the upgrade parts were sourced from China via AliExpress. I bought a Raid Cache module for the HP DL360 because the unit that i got did not came with one and the Disk writes are too slow. After adding the cache the disk write went about 40x faster. I also bought Server RAM modules from China via AliExpress while some memory modules were given to me by a friend for free.


    Problems

    Internet Explorer and Windows

    When these servers first arrived, I didn't not have a monitor/screen that has VGA input. These servers are 10+ years old, HDMI was not yet around at the time. But I though this is not going to be a problem because I knew these servers has a special Ethernet port for for remote management. HP has ILO while Dell has iDRAC. These are basically small embedded web servers running outside the main board and their purpose is to provide remote access to the server management tools and screen even before the server boots up. So you can literally see from the browser what would have been displayed in a monitor attached to the server. The problem is that, 10 years ago most enterprises runs Windows everywhere and rarely Linux. So these management console web application only works on old Internet Explorer. It uses ActiveX controls to emulate the server screen output. Added to the problem is that I don't have a Windows machine. So what I did was to run a Windows XP image on VirtualBox in my Mac and do all my initial setup from this VM.

    Firmware

    Another problem particularly for HP is that the firmware updates only comes in .EXE. So you are gonna need to run Windows just to update the firmware. I had to create a Windows 10 bootable USB stick and let the server boot on the USB stick. From there you can execute the .EXE firmware updates. You can download Windows 10 ISO for free. You just get a warning "Activate Windows" in the desktop.

    Dell has firmware updates for RHEL, so i just booted into a bootable CentOS Live CD USB stick and download all the updated firmware from Dell support and execute. Here's a step-by-step guide video on Youtube that I followed. 

    Noise

    I knew that these servers are loud. I never thought it would be too loud. Their fans spins up to 12000++ RPM, and with 3 of these server running at my home office, the noise is just unbearable. They sound like hair dryers. I looked for software solutions but did not find any for HP. However, I found a solution for Dell. Dell allows you to control the fan speeds remotely via IPMI serial over LAN. You just need to install the ipmitool command line tool and invoke the following commands.

    The first command will disable the automatic fan control and allows you to control the fan speed manually. The second line will set the Fan speed to 10% denoted by the last hex argument 0x10.

    ipmitool -H <IP of iDRAC> -I lanplus -U <USERNAME> -P <PASSWORD> raw 0x30 0x30 0x01 0x00   
    ipmitool -H <IP of iDRAC> -I lanplus -U <USERNAME> -P <PASSWORD> raw 0x30 0x30 0x02 0xff 0x10

    Be careful when doing this. You need to watch out for the temperature reading of your server and adjust the fan speed accordingly. You don't want your server to burn. I found this from a reddit post.

    However, for the HP Server, there seems to be no way to control the fan speeds manually unless I hack the fans. I saw someone online placed an Arduino board to reduce the fan speed, but i decided not to go there. The only solution to quite down the HP server is to keep it cool. I will just have to deal with this physically by building a silent server cabinet which I will talk about in Part 2. Or, I will probably let go of the HP server and replace it with Dell.

    Hardware Topology

    Here how the hardware are connected together. There are 2 subnets, 1 with internet and connected via the router and another one for ProxmoxVE cluster network.

    Up next, I will probably use another Raspberry Pi as LDAP server and another to automate the Dell fan control. Stay tuned for part 2, the Silent Server Cabinet build notes.

    Part 2/4 - DIY Silent Server Cabinet 
    Part 3/4 - Installing a Two-Node Proxmox VE Cluster 

    Part 4/4 - Deploying Openshift 4 on Proxmox VE

Sunday, April 19, 2020

DIY 4G LTE Antenna - Simple Folded Dipole

Due to an unfortunate event related to the coronavirus pandemic, I have been repatriated back to the Philippines from Singapore. I have now temporarily relocated to a remote rural town in Cebu where there is no broadband service lines from any provider. Because I still have to work, I needed a decent internet connection. This sounds so simple but it's actually not. This past week, I have called all the internet service providers in the Philippines and none of them considers my current address as within serviceable area. I realised that my only option is to go through a pre-paid 4G LTE connection. But the 4G service is very poor that I could hardly get 1 or 2 bars of signal on your phone on the street. Internet speed at this signal level is less than 1Mbps. It feels like the 90s. It's obviously not enough to start a video conference for work. Imagine how frustrating this is for someone who lived in Singapore for the past 9 years. I had a 1Gbps fiber optics line in Singapore.


Built-in Antenna


I got a Huawei B135 4G modem-route from a friend despite the lock down and this is the signal strength and the internet speed I got using the modem's built-in antenna while I literally stick it in the window with a duct tape.


Finding the Cell Towers

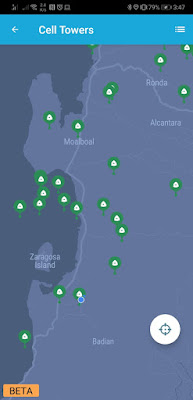
So I did some google search hoping to find information about the location of LTE cell towers. There is not a lot of data about this for the Philippines. But then someone told me that there are mobile apps out that would help me figure out where the cell towers are. I discovered OpenSignal  and CellMapper which gives you the coverage map and the location of cell towers, the details of each cell tower including the frequency band they are using. I learned that the nearest cell tower with 4G LTE service is around 15Km away and is using frequency bands 28 and 3.


This means I could improve the signal strength by using an external/outdoor antenna. There is a lot of online stores including AliExpress and Lazada in the Philippines selling such kinds of antenna. The problem is that the island I am in is in lockdown due to the pandemic. I contacted several sellers but none of them is willing to ship to my location during this period. So I got left with only one choice. I had to science the shit out of it by building an outdoor antenna for my Huawei 4G LTE modem out of whatever materials I can find.


Building the Antenna

I used to be a radio hobbyist and I have designed and built antennas in the distant past. Well, the last one was at least 20 years ago. And in fact, the first software I wrote when I was still learning how to code was a Yagi-Uda Antenna calculator software written in FoxBASE/FoxPro.

While in lockdown, we cannot leave the house. The hardware shops are closed and public transports have been shutdown in the whole island province. There is no way I could go and buy materials to build and antenna, so I jumped in the garage full of junks ang found the basic things I needed. With the things I found in the pile of junks, the simplest antenna design I can build is a folded dipole antenna.


  • A PVC pipe
  • Tie Wire
  • RG6 Coaxial Cable (75 ohm) from an old TV box
  • #12 AWG Coper Wire
  • Electrical Tape
  • Soldering Lead
  • A meter stick
  • An old plastic food tray

I spent the morning sourcing the materials and tools I needed. I also asked for help from a cousin. Because, putting the antenna up on top of the roof is a two-man job. He enjoyed the process as I was teaching him how it's done and how simple it is. He was so surprised that antenna's are that simple and that you just need to get the measurements right.

I no longer remember the formula for calculating the dimensions of a folder dipole element after 20 years of not designing antennas. But hey, this is the 21st century, teh collective human knowledge is on the internet now.

I was pretty sure that if I wrote a command-line application for calculating antenna dimensions 20 years ago, someone must have created the same calculator software on the web within the last 20 years. And, I was right. The first item in the search result of google search for "folded dipole antenna calculator" was this (https://www.changpuak.ch/electronics/Dipole_folded.php), and It was exactly as I expected.


According to Open Signal, the cell tower is broadcasting in 2 different frequency bands which helped me decided to build 2 dipole elements. One for each frequency band. The frequencies are 1800 Mhz and 700Mhz (centered 750Mhz). The 700Mhz band is a good thing. Because it has longer wavelength, it means it can travel through longer distances and it doesn't get interrupted by rainfall.

The build started with building the PVC pipe frame where the dipoles are attached. Then the 2 dipoles were made from #12 AWG solid copper wire. After a few screwing, gluing and taping and soldering, voila, we have an antenna. It doesn't look much like it, but I was very confident it would work. The looks is not that bad for something that is made of junks.


With the help of cousin, we managed to install it on the roof before sunset. Pointed it to the location of the cell tower based on the cell tower's GPS location. Thanks to Open Signal data.

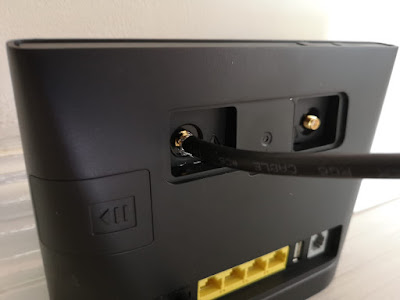
Attaching the antenna to the modem was another challenge. Because the modem's antenna connector is an SMA female socket. I don't have anything like this with me. We also did not find it in the junk pile. So I had to improvise. I filed and sanded off the center core wire of the RG6 to make it thin enough to fit the SMA connector's center whole and forced it in.


The Moment of Truth

I configured the modem to use the external antenna instead of the built in one which only give 1 bar of signal. Few seconds after I plugged that RG6 cable to the SMA connector, I immediately got 3 bars! Not bad. After fine tuning the position of the antenna, I then got 4 bars.


When I tested the internet speed, here's what I got! 6.5 Mbps on average. At late nights it goes up to 11 Mbps. I'm happy it worked well. Now I can work from rural farm home.


I did a few fine tuning on the antenna's position earlier Today hoping to get 5 bars but I didn't. So I guess this is the strongest signal I could get with this antenna. Nevertheless, I'm glad it works.


Sunday, May 19, 2019

Architecting Systems Like A Rock Band

In Software, orchestration often means control, synchronization, mediation and scheduling of decoupled application services in order to fulfill groups of tasks as part of a business processes. In highly distributed systems, orchestrating could be a nightmare to develop and maintain. If not designed carefully, it can lead to a scenario where the orchestrator becomes the bottle neck to future architecture changes. In traditional SOA, the orchestrator is often called the service bus or enterprise service bus. Even Micro-services architecture has an orchestrator. It hides behind the name "Gateway" and "Control Plane".

In an Orchestra, if the conductor leaves the orchestra in the middle of a symphony, chaos could occur eventually. The percussion section could become out-of-sync with the woodwinds and the brass section overtime. This is because each musician and each section rely heavily on a set of rules and patterns in the sheet music and of the tempo and the instructions of the conductor. Remove the music sheets and the orchestra will simply stop playing as the musician will not know what to play next. But not in a rock band.

Rock bands don't need a conductor and often times they don't need music sheets. This is because each musician do not rely on a single person to give them instructions. Instead, they listen to each other. They listen to the drum beat for the tempo. They listen to the singer to know which section they are in the song. They listen to the guitarist to know when to bring down their instruments volume to bring up the guitar solo, and so on and so forth. Each musician also knows what they need to do and when they need to do their thing without being told when and how. They decide when to do things based on what they hear. And because they don't follow music sheets, they can improvise and make the music sound better than expected. They can recover quickly from failure, i.e. a broken guitar string or a thrown away drum stick or improvise when this happens so, but they never stop playing just because of it. This is why each live performance is a bit unique as opposed to the musicians in an orchestra. In other words, musicians in a rock band react to events instead of being conducted.

Event-Driven Architecture

Broker Event-Driven Architecture

Event-Driven Architecture is recently catching the attention of software architects and engineers Today because of its simplicity and versatility. Components are loosely coupled. The interface contract definition does not have to be defined up front and can be easily changed. There are no more request-response (synchronous type or communication) and messages are pushed and not pulled. When pulling data a service needs to know upfront where to pull the data from. But when you push events/data, one does not need to know to which specific service you need to push the data to. There are many advantages of this architecture except if the system is too large, say 1000 services/actors, in which case the risk of loosing the enterprise-wide event broker becomes unacceptable.


The Rock Band Architecture

Similar to EDA, in a rock band architecture, the role of orchestration is delegated and distributed among each of the services. Independent services listen for events and react to those events whenever necessary. Services also broadcast events but they don't need to know how other services would react to it or would use those messages, or if other services are even listening. Much like a rock band, each musician is responsible for playing his own instrument but they also communicate by listening to each others instruments and looking at each other from time-to-time so that collectively, they can deliver the music as a one pleasing rock symphony. 

But there is a fundamental difference. Rock Bands are small. When you put 1000 rock musicians together and play the same song, it's fun for sure but it does not sound as good as a single 5-pieace rock band on a small stage. This is because it is so difficult to synchronize a huge number of musicians and that is the reason why orchestras need a conductor.


Sound travels at 342 m/s. So if you put a drummer and a bassist 100 meters apart, they will be de-synchronized by 1/3 of a second and that's what you are hearing in the video. The drums are not crisp and the bass guitar lost its punch.

Similar principles apply to Event-Driven Architecture. If two-closely relate services need to send messages to each other but there are 5 topics to go through before reaching the other end of the channel, you are loosing time and it's not efficient. 

Another important aspect to consider when deciding an architecture is how well it fits in the enterprise organization. Teams maintaining and building applications in a huge organization don't often speak to each other and the bureaucratic processes behind this are counter productive. No matter how you try to break the silos between teams, sections and departments, you can only do too much. So when different silos are sharing a middleware such as an Event Broker, what organizations usually do is to create another silo, such as a dedicated middleware team, to maintain that middleware. And from then on, teams and departments has to go through them when they want to establish a communication interface. That's a new layer of red tape.

The Rock Band Architecture is a Federated Event-Driven Architecture. Because bands sound better when they are the only ones playing the music in a small stage closer to the audience.

Rock Band Architecture - Federated Event-Driven Architecture

Instead of one single event broker, each silo has it's own event broker. This maximizes the freedom of the teams to choose how to implement their event broker. This also reduces the work on coordination between the silos. Overall, this reduces the effort required for dependency management.

The Event Broker

You don't need an orchestrator or a conductor in a Rock Band. What the system needs is a channel of communication where services can broadcast to and listen for events. The Event Broker. A rock band only needs a stage and their instrument monitors (the big speakers and guitar amps you see on stage). Events are not some generic free-form messages but are specific, small, real-time and contextual. The messaging channel for the event broker must have the following properties:
  1. Events must be broadcasted in real-time or near real-time, otherwise the band would be out of sync.
  2. The communication channel must also use a protocol that is platform agnostic so that services can be built in any platform and developed in any language
  3. It supports any kind of endpoints, i.e. HTTP, HTTP/2, TCP, UDP, MQTT, etc...
  4. It implements a publish-subscribe or consumer-producer messaging pattern
The Players

The services in RBA are the band members or the "Players". Each player plays a specific role that makes up the entire system or subsystem. Service can be in any form of software component (or even hardware) that is either subscribed to one or more topic or is publishing to topics or doing both. Services in RBA are similar to the "Actors" of the Actor-Model architecture pattern, they are completely isolated and are not aware of each others existence but players in RBA are much richer and performs more than just primitive calculations compared to Actors. They are also "stateful" and are always up and running. A player can be as big as an entire application or as small as a serverless function. Players are monitored so that in the event of a crash, there is something or someone that can do something about it like a player service automatic restart or an severity 1 incident raised to the helpdesk. One way to do this is to design the player service so that they are sending heartbeats regularly to a specific topic on the event broker.

The Band

A Band is a group of Players that are connected to a common Event Broker. These player services are grouped functionally into a Band. The grouping can be done in an organization context or by a more detailed context like a subsystem or even an application. The goal is to minimize dependencies between systems and/or organizational unit.

Edge Services

The services that are publishing  messages outside of it's own band are called Edge Services. I wanted to call it the "Groupie", but my wife doesn't approve. There can be one or more Edge Services in a band. Edge services must only publish messages to other band's event broker and must not subscribe to other band's event broker. This simplifies the service as they don't have to maintain a persistent connection with an event broker outside its perimeter.

Summary

Enterprises continue to implement SOA architectures and have also begun adapting event-driven architectures (SOA 2.0) as the standard for many of their applications. But organizations are also becoming more and more agile. Being able to decentralize event brokers in a federated manner can reduce or eliminate organizational dependencies between different silos which in turn would produce a more empowered, agile team who can make important architectural decisions on their own with minimal/isolated risk of impacts.


Monday, August 21, 2017

DIY 3D-Printed Electronic Drumkit : Update


After playing my 3d printed drum-kit for a while, I started feeling a bit unsatisfied with some of the parts. I figured I needed a snare drum with a rim shot and a bigger pad area. Also, the hi-hats do not feel like a real hi-hat as it doesn't physically open or close. Very often, I always miss the tempo when opening and closing the hi-hats with just a foot switch. I also figured I would need a new Midi Trigger interface because I cannot just attach those new pads to my existing cheap Medeli drum module. I also expect the look would be a lot cooler with bigger cymbal pads. So, here's what I did.

The Snare

I bought a Millennium Mesh Pad snare just before they discontinued the product Millenium PD-1012 12" Mesh Head Pad for only 66EUR. It's a cheap mesh pad snare. But I did not mind, because I was only interested in the shell. I replaced the head with a Roland V-Drum Powerply (it's a 3-ply). It's quite expensive but is worth it. I got all of them from Thomann online. I re-positioned the piezo sensor though in a way that a foam is pushing it a bit harder to the mesh head to increase sensitivity. Then I bought a $32 snare stand from Swee Lee.

The Hi-hat


I bought an Alesis Pro-X Hi-hat for 80 EUR and a Millenium hi-hat stand for 40EUR. Assembled the wiring and voila! I was a bit disappointed by the quality though. But what would you expect for a $100 hi-hats.


The Module

While looking for the famous Alesis Trigger I/O product online. I learned that the product was discontinued by Alesis and that they sold it to DDRUM. The same product is now known as DDRUM DDTi. I got mine from Thomann as well for 150 EUR. It's a bit expensive, I didn't have a choice because the only other product that does the same is MegaDrum and is more expensive. I also designed and 3D-printed a mounting plate so I could mount the trigger interface to the frame.


The Cymbals

Having a bigger Snare and a bigger hi-hat (12"), I needed bigger cymbals. Otherwise it looks and feels weird. Luckily I found a guy selling a pair of Yamaha cymbals in Carousell for just $100 for the pair. It was a bit dirty and scratchy so I cleaned it up with some leather wipes. I also had to open it up and re-wrire the sensors because Yamaha cymbals are not wired in a standard way where the bell, the rim are independently outputed. A small resistor had to be removed from the Yamaha cymbals to make it work with Roland modules or in this case the DDRUM DDTI trigger interface.


The Pedals

The last thing I upgraded was the pedals, I wanted a double pedal so I could play Metal. Duh!!! I found cheap Millenium pedals again from Thomann as well. It arrived in a box together with the trigger interface and It felt like Christmas.


And finally after putting everything together, here's how it looks now. Isn't it cool? This electronic drum kit cost less than your iPhone. All the toms are 3D-printed.


Sunday, August 13, 2017

Jieming's Router Anomaly

Last night, while randomly watching my router's activities, I found out that it has an active connection to some IP address owned by Amazon and hosted in New York. While trying to do curl request to the server's port 80, it returned a website and when I opened it in browser I was quite surprised because it is a ASUS router's web interface (ASUS RT-AC5300). The weird thing is that I was able to login automatically without being prompted with username and password. And also I am able to see everything, including the local devices connected to the router and administration settings. I tried changing something but it doesn't seem to persist the configuration change. So I took a look at the site's client scripts and it's kind of weird. By the look of the Javascript code, the apply button will never work at all. It looks like it was deliberately done.

I tried digging deeper and see which of  my processes  are connecting to this server and it say's com.apple. It means some native Mac OS process, behind my back, is connecting to this server in New York for a reason I don't know.


I went back to the remote router's web interface, checkout the client list. There are 2 connected devices to this router listed.


I tried to enable SSH on the router so that I could tunnel to the devices with no success because the changes doesn't get persisted. I spent few hours trying to know more about this router and why is it publicly opened. I setup a Wireshark listener to listen to the wire and look at the packets being sent and received to this router and I left it running overnight. Then I slept at 5:00 AM.

The morning after, the first thing I did was to check the Wireshark trace and was disappointed to not find any entry. When I scanned my active connections again, it seemed that the IP address is no longer there in the list of active connections. But I am seeing new ones and again check them in browser. I was suprised that for another IP address, I was getting exactly the same web interface of an ASUS router. The IP address is also geo-located in New York and owned by Amazon.


When I check the client list (the devices connected to the router), I got exactly the same devices with exactly the same MAC addresses. I realized this must be the same router. But the problem is that when I did a reverse DNS and a trace of the 2 IP addresses, they do not agree. The DNS server is saying that those 2 IP addresses does not belong to the same server. The trace is also being routed differently between the 2 IP addresses. It got me scratching my head for a while.

I stopped for a while, brewed some coffee and spent few minutes over a coffee recalling what i have done so far to investigate. I am running out of options so I went to google. Guess what I searched for? I searched "Jieming-PC" hoping to find some guys also having the same problem with whoever this Jieming is. The first 2 results was from a domain "demoui.asus.com". So all this time, I was looking at a demo UI of ASUS routers. Whew! That explains why they look the same, with the same clients. That is just one problem solved because I still don't know why a Mac OS (com.apple) would connect to a demo UI of an ASUS Router somewhere in New York.

I suspected that maybe because I am opening the my Router administration page and that this page is trying to connect to that server. I investigated further by looking at the source code of the ASUS router admin page and finally I confirmed that the page is connecting to that remote IP address to check for Firmware upgrade. I still have one little problem why did the lsof command say that it was "com.apple" who is connecting to that IP and why not "Firefox" (I am using firefox) ?  I did a little and found the exact apple library responsible for the connection. It was apple's WebKit which is obviously used by Firefox.


What Really Happened?

What really happened was that when I opened up my router administration page, the first thing it did was to check if there are new version of Firmware available. I updated the firmware. It connected to www.asus.com and downloaded and installed the firmware. The router rebooted. I had to re-open the router administration page. Again it checked for available firmware versions through www.asus.com. Because of load-balancing it got forwarded to some another server (another IP address). This explains why it connected to 2 different IPs. It also turned out that the server used for firmware upgrades are the same server hosting the Demo UI.

Whew!!! Now everything is solved. I can now sleep well knowing that my home network is safe and Jieming is not a Chinese hacker. One lesson I learned and that is I should stop being paranoid.

But anyways, it was a good exercise. I haven't done this kind of things for a long time and now I felt like I'm Sherlock! :D :D

Tuesday, May 3, 2016

DIY 3D-Printed Electronic Drum Kit


Source files available in GitHub: https://github.com/rossbrigoli/Tambol

Inspired by a 3D printed drum pad by Frank Piesik, I decided to make my own 3D printed drum pads. I have an old cheap Medeli DD402 electronic drum kit lying around and not used for quite a while because of some faulty piezo-electric sensors that I was too lazy to replace. So instead of fixing the those faulty noisy rubber drumpads, I thought to replace it with a 3D-printed mesh head drum trigger.

I have made up my mind from the beginning that I will replace every rubber drum pad of my Medeli drum kit with a 3D printed one. This meant that I had to print 4 drum pads and that I have 4 chances/opportunities of improving the design. I did it in a Agile/ Iterative way and also in a modular design so that I do not have to re-print the whole thing if I decide to change the design in the following iterations. I only need to re-print the specific parts that was affected by the new design.

Iteration 1

I took the design of Frank Piesik from GitHub to have a baseline to start with. The design is good but I could not print the drum's shell because it's too big for my Kossel Mini printer. I started the first sprint by redesigning the shell and by breaking it down into smaller pieces that will fit inside my printer bed while keeping the original rims and the base. My printer print radius is 180mm and the shell actually has 180mm of diameter. I could not print it as a whole because of the nature of Kossel Mini design. It could not print a full 180mm circle because the hot-end fan will hit the belt of the Y tower (front left). I also modified the rack mount so that it can be mounted into my existing Medeli drum rack.
Half of the base being printed.

The drum will not work without a drum head of course. I learned about a "mesh head" from a friend who owns a Roland VDrum set. Mesh heads are drum heads but unlike the regular drum heads it is made of material that does not cause air vibration when hit and it looks like a loosely weaved cloth, a mesh basically. This is typically used to replace the regular drum heads of acoustic drum so that they become quite and be used for practicing drums in your flat or your apartment without getting shouted by your neighbors. I bought 4 Pintech Reaction Series Mesh headsfrom a UK-based online store Musician's Friend for S$30 a piece. It was quite expensive but it was worth it. There were cheaper options, but I did not like the reviews.
Pintech Reaction Series Mesh Head


Printing all the parts took around 24 hours. After printing all parts, I put all parts together using M6 bolts. It was very easy to assemble which only took few minutes.


It was working OK, but as soon as soon as I started cranking up the bolts to tighten the mesh heads, many problems came out. Here's the top 4 of them.
  1. There is just so much pressure focused at the center of the shell that made warp. I guess the original designer's objective of making the center of the shell the only point of contact with the base is to distribute the force evenly and to isolate vibrations of the shell with the base. It also did not work well at isolating the vibrations so I thought I had to redesign this whole thing.
  2. Another problem was the threaded rods started bending significantly, as you can see in the photo, even before I reach a mesh head pressure that is good enough for drumming.
  3. A third problem was that the shell becomes to shallow because I added bridge in the middle of the shell to make room for the bolts that are holing the two parts together. When I hit the drum hard, it makes an ugly "Tick" sound as the drum stick hits the bridge in the middle of the shell.
  4. The last problem was the location of the sensor, it's not in the middle therefor the responses to every hit is not uniform. There is a significant difference when hitting the top and the bottom part of the drum head. There is no option in my cheap drum module to adjust the sensitivity or to add compression.
Iteration 2

In the second Iteration, I decided to redesign everything while maintaining some aspects of the original design like the 4 threaded rods as the base. This time the rods goes through the shell while the shell socket becomes the holder of the piezo sensor.

The shell is also now in 3 parts instead of just two. This is to make room for future builds. 3-parts means the drum can be scaled up and still remain printable in a Kossel Mini printer. The photo above shows the actual result of Iteration 1 and the new design of the second iteration. I knew that iteration 2 will not be so successful because it's a completely new design so I also printed the second iteration in blue to experiment on the looks. I wanted to see how blue would look like.


Iteration 2 was failure. It's totally an experimental iteration. There some part of the design that I missed. I forgot to consider the thickness of the aluminum rings of the mesh head. As a result, the shell was too shallow and that there is not enough room for the mesh head to be pushed down further before it hits the base. it can still be used but the heads are too loose it doesn't feel like a drum head. There is not enough bounce. Although it's a failed iteration, it's not a wasted iteration because I learned a couple of things to correct in the next iteration.

  1. I learned that blue looks ugly in my rack. It looks very cheap, almost like a toy.
  2. I also learned that the shell was too heavy and way to thick and too strong.
  3. I learned that I need to make it taller to make room for the aluminum rings of the drum head.

Iteration 3

All the 4 issues of the first iteration and the 3 things I learned from the second iteration have all been addressed in 3rd and the result was amazing. The structure is sturdy enough that you can tighten the heads up to a point when it produces a note similar to that of an expensive Roland V-Drums mesh pads.


I am happy with the results of iteration 3 and almost wanted to stop there and print everything based on iteration 3. But I thought that maybe this shell is still too thick and too heavy. So started Iteration 4.

Iteration 4

Iteration 4 was a refinement of the Iteration 3's design and the finalization of the piezo electric sensor mount. I redesigned the shell by putting holes in its side to make it lighter. I also made the walls a little more thinner.


Iteration 4 shell being printed.

The final design showing all parts and the assembled shell.

It is roughly around 20% lighter than Iteration 3. I am very happy with it and decided that this will be the final design for all the pads I need. So I started printing 2 more shells like this. I did not want to change the Iteration 3 shells because it was almost the same. It is just heavier. So I only need to replace the shells of Iteration 1 and Iteration 2 drum pads. This is the benefit of designing it in modular. I didn't have to reject all parts of iteration 2, I was able to reuse the base and the rims.

I forgot the mention that in the second iteration, I also made a little modification on the rims because I didn't like seeing the the edge of the mesh head showing that yellow adhesive thing. So I added a 45 degree lip inside the rims to cover it. The photo above shows the final parts of the final design.

While printing the shells, I started coming up with the good mount for the piezo-electric sensor. It has to be isolated from the shell so that it won't pickup vibrations from the shell. But it has to pickup every vibrations from the mesh head. I looked at some commertial trigger cones but they are too expensive for just a simple rubber cone thingy. Here's one from ebay at US$12 each. I experimented on few materials. In fact my girlfriend was wondering why I bought different kinds of sponges. :) I laughed because I did not realize that it looked so weird buying all those stuff. After trying few of the materials, I finally settled for the EVA anti-slip pads.


I used anti-slip EVA/rubber dots which is very cheap in a local neighborhood hardware shop. I bought different sizes and stack them together to form a conical shape using a generic transparent adhesive. I have tested different approaches in previous iterations but so far this is the most effective.

The final product based on iteration 4 design. You can also see the sensor mounted at the center.

I am happy with the overall performance of this drum. My drum kit now feels like an expensive kit. Very good bounce that feels like an acoustic drum. No more pain in the wrist like what I usually get from rubber drum pads. My drumming is now less annoying to the neighbors and to the people watching your without a headset.

After assembling all 4 drum pads, I finally removed the old rubber pads and replaced them. The black and white looks very good on my rack. The blue rack mount part was a re-used part from iteration 2.

3D-printed mesh head pads next to the old rubber pads.
How cool looking is that?
Before testing I also have replaced all the piezo-electric transducers of the cymbals and the bass drum because I have a lots of extra piezo-electric transducers lying around. I bought a 20-pieces piezo-electric transducers from China through AliExpress for just $3 and shipping is free. The triggers are a lot better after replacing them. It feels like a new drum kit.

Iterative and Modular

As a software engineer, it make sense to make this project in an Iterative and modular approach. The benefit for doing iterative approach is that for every iteration you have an opportunity to redesign or improve the design of your model. While the benefit of making it modular is that you do not have to reprint everything of the previous iteration, you only need to re-print the parts that was affected by your new design. Thought there is one major difference between a software and hardware projects. Hardware projects are same as in construction or civil engineering in a sense that they involve materials unlike software engineering. For every re-design, materials are wasted. In this case, here are the total materials wasted due to the iterative approach.


You can also download the source files from GitHub and print your own drums.

Checkout the drums in action in one of my cover music videos.

Popular